This Photoshop tutorial shows you how to create cinematic look from ordinary digital camera photos. You’ll learn how to apply movie color effect in Photoshop in 6 easy steps. Besides movie colors, you will also learn how to recreate movie lighting with Lighting effects filter. It’s important to choose suitable source image to follow this tutorial. It shouldn’t be very colorful or bright. Neutral or pale colors would work better and make your job easier. This is a guest post by Almagreta. If you want to guest post on this blog, check out the guest post guidelines.

Let’s start. I chose an absolutely ordinary looking photo.

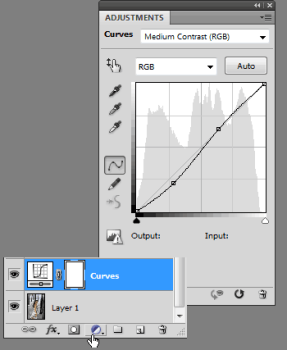
- Create a new Curves adjustment layer with Medium Contract preset to increase contrast.
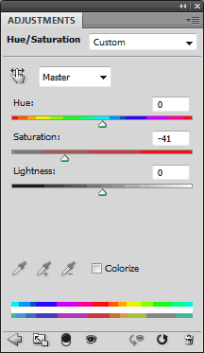
- Then create a new Hue Saturation adjustment layer and decrease saturation to make uniform colors.
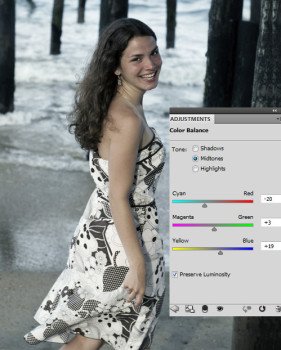
- Apply Color Balance adjustment Layer to make colors looking more effective.
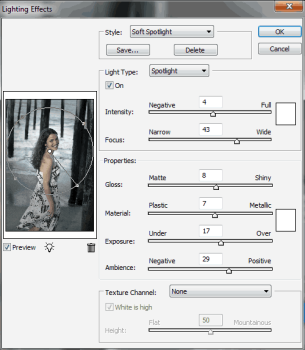
- Merge Visible Layers (Shift + Ctrl + E) and apply Lighting Effects Filter (Filter > Render > Lighting Effects). Experiment by clicking and dragging points on the circle to highlight the area around face.
- Now create a new Levels adjustment layer to make rich black color.
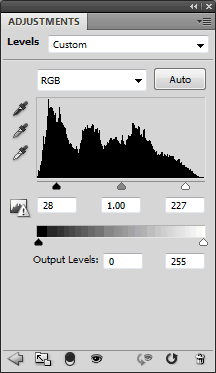
- Last touch makes colors warmer and adds a distinctive light to your image.
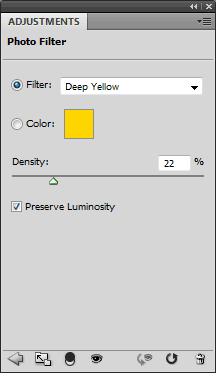
Create a new Photo Filter adjustment Layer with the following presets.
This is the result.
Cinematic look – Movie color effect
