Some photos look special in black and white while they look just plain flat in color. Black and white gives the special mood and atmosphere to the photo. You can try and decide if your photo looks better in black and white. There’re numerous techniques to convert color photo into black and white. Here we describe three ways for black and white conversion which work best of all. These methods produce great looking black and white photos in any situation and you can tweak them to your taste to achieve the exact look you want.

Convert photo into black and white using Channel Mixer
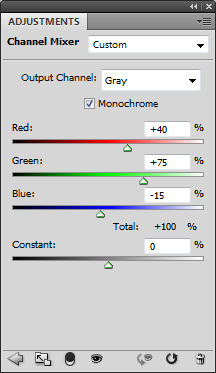
1. Create a new Channel Mixer adjustment layer (Layer->New Adjustment Layer->Channel Mixer).
2. By checking the “Monochrome” box you convert the image to black and white. Default settings: 40% Red, 40% Green, 20% Blue. To get a better result you can experiment by moving sliders. Their total percentage has to be 100% or otherwise you will lose some details.
3. Increase contrast of the photo to make it look more impressive. You can create Levels adjustment layer for that.
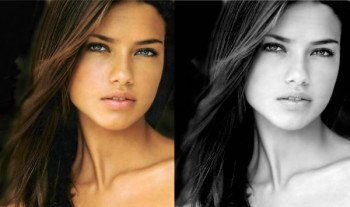
4. The result looks much better than the original.
Convert photo into black and white using Calculations
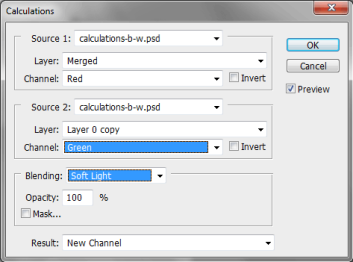
1. Go to the Image menu and choose Calculations. (Image-> Calculations).
2. Change Multiply Blending mode to Soft Light, which is more balanced. Then choose Green channel from Source 2 section.
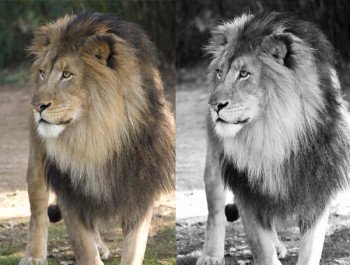
3. In the most cases that’s it. Go to Image menu and chose Grayscale mode (Image-> Mode-> Grayscale) and save your picture.
In some cases Blue channel works better. But if your picture is tricky and doesn’t look good or you want to get something different you may try blending different channels from Source 1 and Source 2 sections until you get the best result. You could also try Overlay Blending mode instead of Soft light and change opacity.
Convert photo into black and white using Gradient Map
1. Set black as Foreground color (press D). Then go to the Layer menu and choose Gradient Map (Layer->New Adjustment Layer-> Gradient Map).
2. You are done! This simple step gives you a good result.
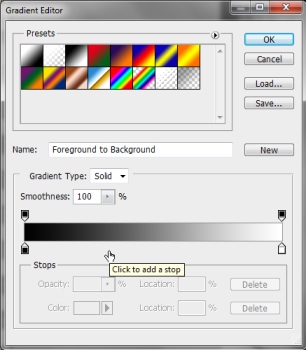
3. If you are an advanced user and want to improve the black and white conversion you can correct gradient. Click on the gradient in Adjustments panel.

4. You opened Gradient Editor dialog. You can add a color stop by clicking on the gradient.
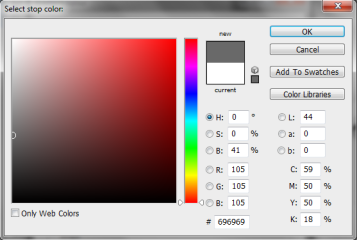
5. Choose the Gray color (double-click on the color stop) which works better for your image by clicking and dragging your cursor on the left side of the Color Picker right up against the edge. You will see the midtones changing on your picture while you are dragging the cursor. If you like the color click OK. Don’t close this dialog yet.
6. Now you can drag the gray stop you’ve just created to the left or right to make the image darker or lighter.
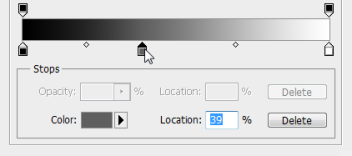
7. When you think that you like the result click OK.