
If you’d like to sharpen your photos don’t do it simply by applying Photoshop filters such as Unsharp mask or Smart sharpen. If you even will be as accurate as jeweler you can’t avoid unwanted effects. Most of sharpened digital images have a slight “halo” at edges, one that can usually only be seen by enlarging the pixels or knowing exactly what to look for. Edges can obtain interesting “artifacts” when sharpened. Before we start with two perfect techniques for sharpening images, have a look at basic rules for sharpening.
Sharpening Rules
1. Perform all other changes (color correction, saturation changes, distortion corrections, etc.) before sharpening.
2. Save a copy of the corrected, but unsharpened version.
3. Use the Unsharp Mask for basic sharpening, as it provides more control than the other related filters.
4. If submitting to a professional designer, send the unsharpened version, as you don’t know how dot gain may change the amount of sharpening necessary.
Lab Color Sharpening
The reason for using a technique like this is that sharpening colored edges means that the Unsharp Mask uses the color data to determine how to modify the edge. This sometimes results in minor shifts in color in the sharpened areas.
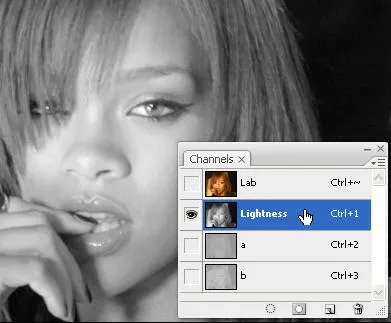
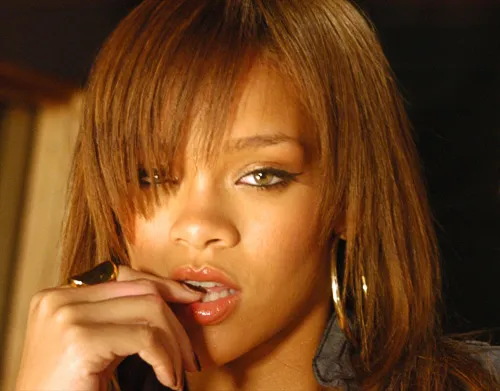
We start with this with this Rihanna portrait which surely lacks some sharpness.

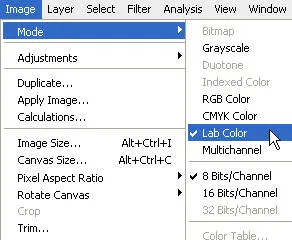
1. Convert your document to the Lab Color space (Image->Mode->Lab Color).
2. Click on the Channels tab in the Layers window and select Lightness channel (Ctrl + 1).
3. Apply Unsharp mask (you could also use Smart Sharpen in Photoshop CS2 or higher).
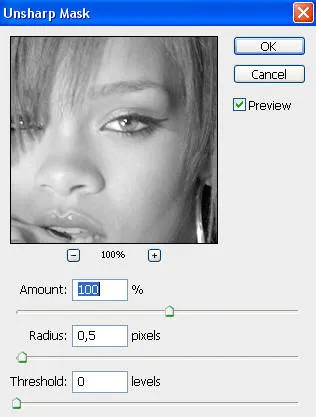
Amount: start with 100, decrease or increase it depending on the picture.
Radius: start with 0,5 and try to avoid going much higher.
Threshold: leave 0.
4. Go back to all channels image (Ctrl + ~).
5. Convert it back to RGB Color (Image->Mode->RGB Color).
6. All done. Here is our result.

High Pass Sharpening
Though not so widespread as the previous one, this technique often gives you better results than Lab Color Sharpening.
1. Copy image to the new Layer. Layer->New->Layer via Copy (Ctrl+J).
2. Now desaturate this new Layer. Image->Adjustments->Desaturate (Ctrl+Shift+U).
Your image should now look as black &white.
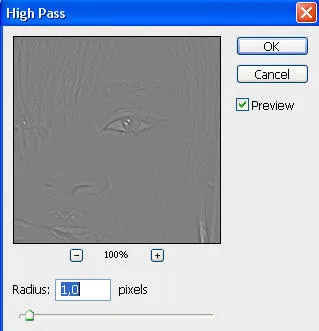
3. Apply High Pass filter. Filter->Other->High Pass (depending on the size of picture Radius varies from 0,3 till 1.5 maximum).
4. In the Layers window set blending as Overlay or Soft light.
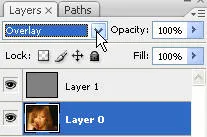
5. All done. Here is our result.
If you’d like more sharpness, duplicate the upper Layer. Layer->New->Layer via Copy (Ctrl+J).
If you’d like less sharpness decrease Opacity in the Layers window.