HDR tutorial: how to create HDR photos with free Qtpfsgui and GIMP
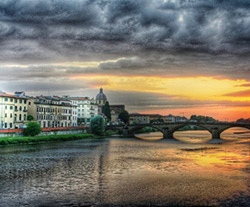 In this HDR tutorial you’ll find out how to create HDR photos using Qtpfsgui and GIMP (you can use Photoshop as well). Both Qtpfsgui and GIMP are free, open source and available for Windows, Linux, and Mac OS X. With free Qtpfsgui you can get more impressive HDR photos than with paid HDR software competitors. Though Qtpfsgui interface is not so sllick as in commercial HDR products and this app is not fast by tone-mapping, the main drawback from my point of view is its ridiculous name which no one could remember.
Before start with Qtpfsgui and HDR processing you should have at least 3 so called bracketed photos, i.e. photos taken with different exposures. One photo should be underexposed (EV-2), one photo with normal exposure (EV 0) and one overexposed (EV+20). If you don’t right bracketed photos right now you could download samples of photos for this HDR tutorial (sample photos for HDR 1 © Bartłomiej Okonek, these photos are used for this tutorial and sample photos for HDR 2)
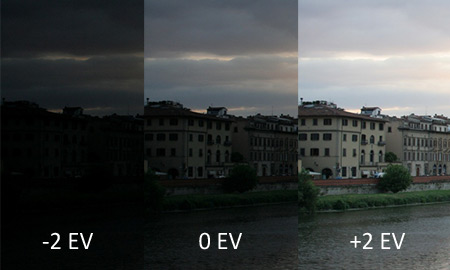
1. Download and install Qtpfsgui. Don’t forget to extract DLL package which you should download separately into the app folder if you’re using Windows.
2. Click New HDR. In the window that pops up, click Load Images and choose 3 photos you prepared before. Qtpfsgui now try to determine automatically the exposure value from the EXIF metadata in the image; if it failed which happens sometimes for various reasons, you have to set it manually.
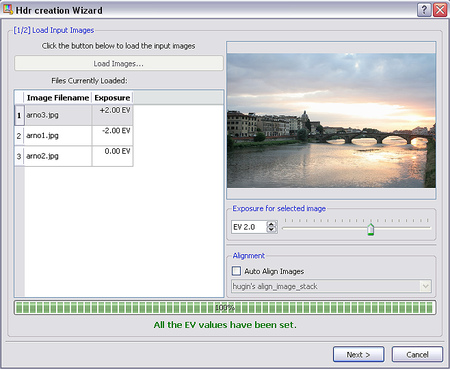
3. Click Next and skip the next window. You can try to use antighosting feature in this dialog box but developer says it’s experimental and buggy.
4. Skip the next window too. There’s number of predefined profiles to choose from and they give you slightly different results but the default option usually works well. Click Finish. Now you have a HDR image and you need to tonemap it to be displayed correctly in a low dynamic range, i.e. JPG format.
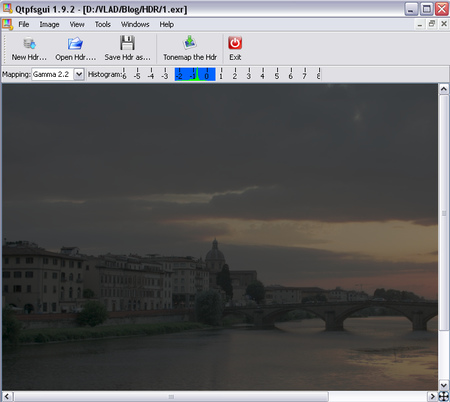
6. Click Tonemap HDR button in the toolbar. A window will pop up with a number of tone mapping algorithms and parameters.
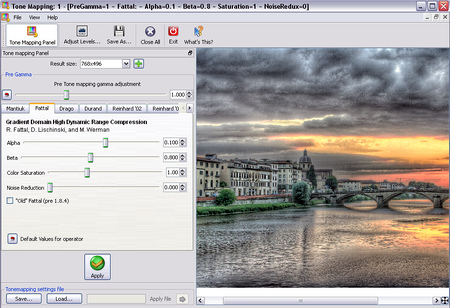
7. Chose Fattal tone mapping operator and click green button Apply. Save your image File -> Save as. Make sure to give your file a jpg extension. Experiment with smaller than original version of your photo until you get the appealing results to speed up the process. You can pick a smaller one from the dropdown box of different sizes near the top left. You can fine tune the result by clicking Adjust Levels button.
8. Chosse Drago tone mapping operator tab and repeat the previous step.
9. Put two tonemapped JPGs into GIMP. Use image tonemapped with Drago for the first layer and the Fattal tonemapped image for the second layer. Change the Layer mode to Overlay. Play with the Opacity to achieve more pleasant look.
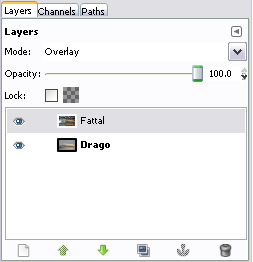
You can also put the Fattal applied image down as the first layer and the Drago applied image put on the top in Overlay mode with ~50% opacity.
You can get good looking HDR photos with Fattal+Mantiuk tone-mapping technique as well. The process for tone-mapping of two images with different algorithms is the same as in previous step. Just instead of Drago apply Mantiuk tone-mapping to the second image. Put Fattal image on the first layer In GIMP and Mantiuk on the second one. Change Layer mode to Soft light and play with Opacity. You could also apply some Blur to the top image to get dreamy look.
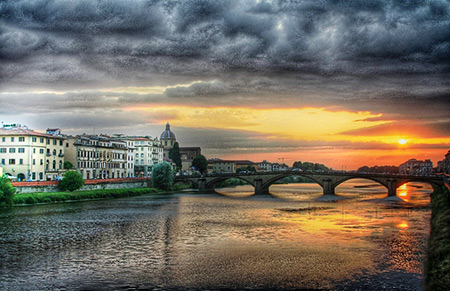
10. I recommend to post-process your HDR photo in GIMP (you can use Photoshop as well). Increase contrast by applying Levels or Curves, adjust the colour/white balance and apply light Unsharp mask. You may also got weird ghosting artifacts during processing HDR photos with Qtpfsgui and fix it using Layer mask and original image.
How to create fake HDR photo from one JPG or RAW file
Though there’s little sense you can try to achieve fake HDR look with single jpg or raw file. You can load directly a raw file in Qtpfsgui via the File->Load HDR and tonemap directly single raw file. If you don’t like how Qtpfsgui handles your raw file, or if you want to process your raw file before loading it in Qtpfsgui (white balance, color profile, etc.), you can use Ufraw (as standalone or GIMP plugin). Tweak the color settings of your raw file and then save the result as a 16-bits (important!) tiff tile and then load it into Qtpfsgui.
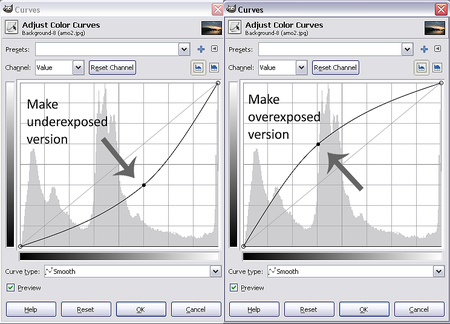
If you would like to make fake HDR photo from one jpg file, create 2 additional versions of this file. Open your normal.jpg file in GIMP and use Curves to make underexposed photo (click in the middle of the curves dialog and drag it to the bottom), then save it as underexposed.jpg and overexposed photo (drag the curves in the same way to the top) save as underexposed.jpg.

8 thoughts on “HDR tutorial: how to create HDR photos with free Qtpfsgui and GIMP”